Outline
Create an outline whenever you want to work on the blueprint of your plans, ideas or projects, and have a clear overview of their key points.
The outline allows you to organize your ideas before starting a project. Use it in the prewriting process of your papers, or if you simply want to illustrate the connections between concepts (cause, effect, example, etc.). Support your research by creating an outline with the information you found.
Creating an outline
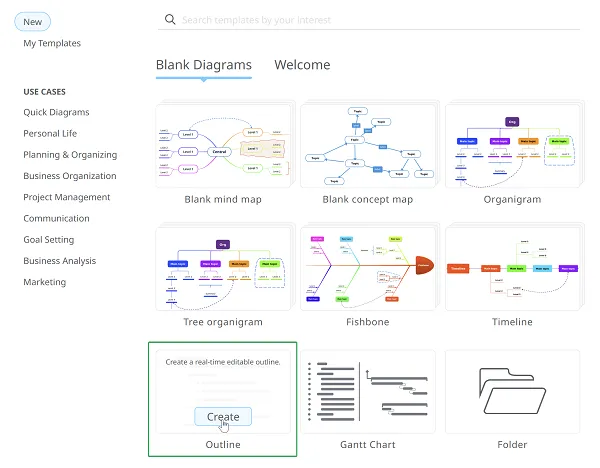
Section titled “Creating an outline”Click on the Create button on on the top-left corner of your Dashboard.

Then go to the Outline section and click on Create.
Structure of an outline
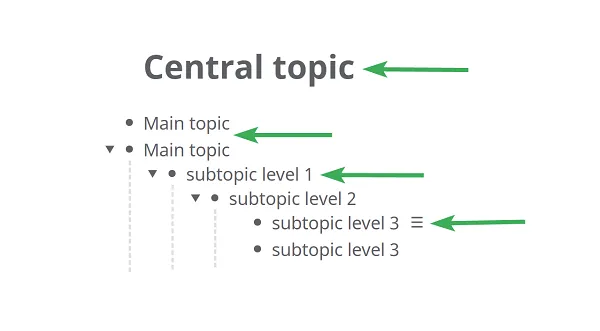
Section titled “Structure of an outline”The title of your outline has the largest font size and the style of its text is bold, by default.
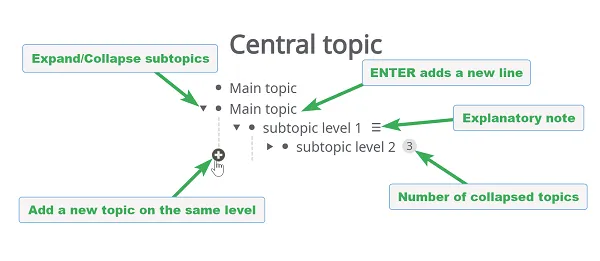
The main topics of the outline look like a bulleted list, on the same indentation level. Their text style has a smaller font size.
Subtopics have a higher indentation than the main topics and their text style is regular.
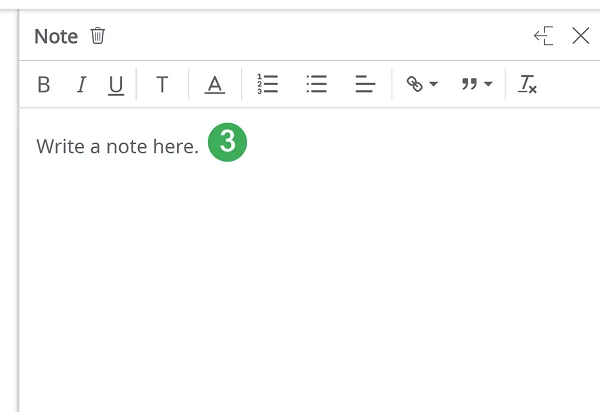
Explanatory notes are added next to the topic. You can click anytime on the icon with the 3 lines to edit what you wrote in the Notes panel.
Editing an outline
Section titled “Editing an outline”The outline’s text can be edited in a way similar to how you normally would edit the text in Microsoft Word, for example.
Add more topics to your outline with ENTER, or from the context menu when you right-click next to a topic.
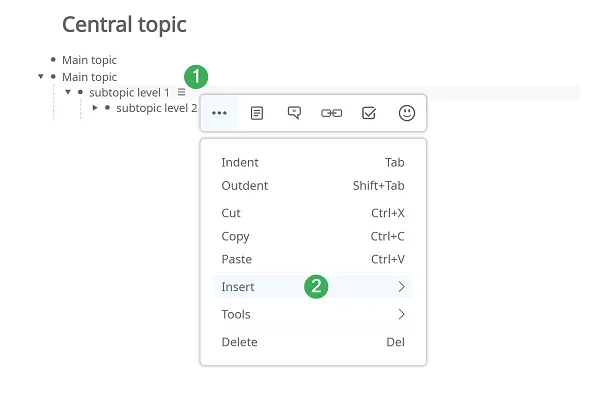
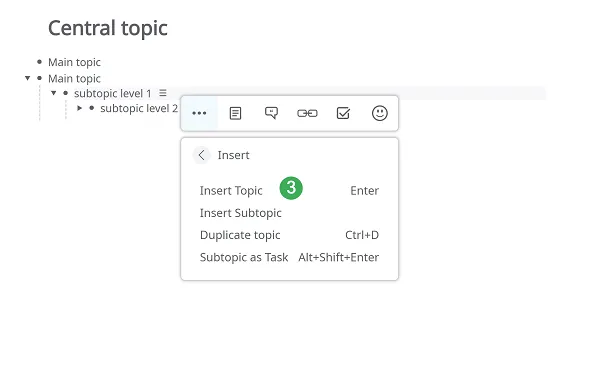
Use the TAB key to increase the indentation level of any topic.
The outline’s nested hierarchy allows you to collapse all the subtopics of a certain topic with the ”-” icon. Click on ”+” to expand them.
Explanatory note
Section titled “Explanatory note”To add an explanatory note follow these steps:
-
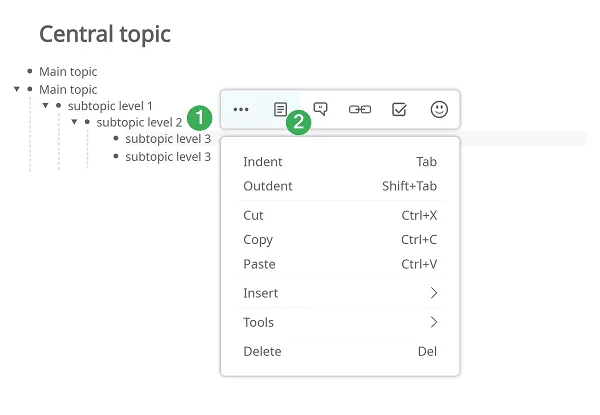
Right-click on a topic to open the Context menu.
-
Click on the “Notes” icon.
-
Write a note to add details related to that topic.
Drag & Drop
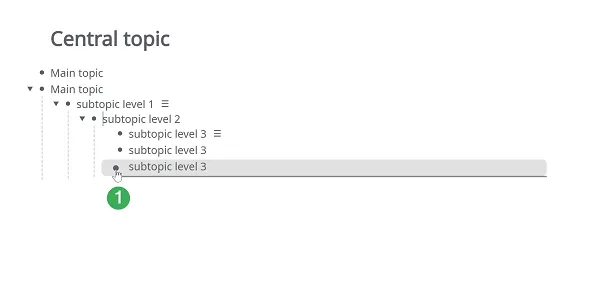
Section titled “Drag & Drop”Drag & drop topics on your outline to quickly reorganize its layout. Hover over the bullet point in front of the topic to select and move it.
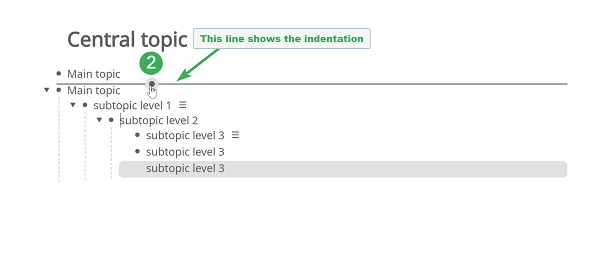
The line you see when you hover over another location allows you to choose the place the topic will occupy in the outline’s hierarchy. Drop the topic wherever it suits you best.
Drop it on the same indentation level as the outline’s title to remove any relationship of subordination and turn it into a floating topic.
Drill Down
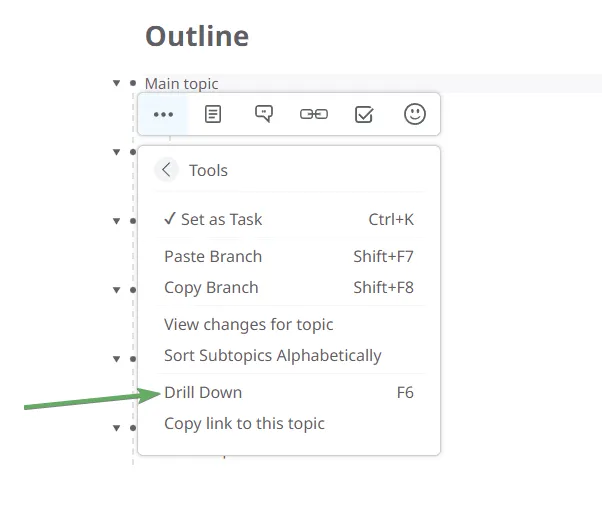
Section titled “Drill Down”To focus on specific content, go to a topic line and select the Tools menu, then the drill down option (or F6). This will allow you to focus on the content of the topic, by hiding everything else. Go to Home on the top-left side of the window to return to the full outline view.
Adding comments and icons
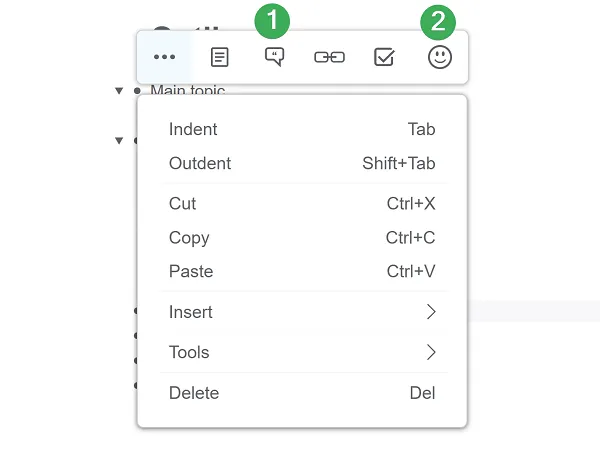
Section titled “Adding comments and icons”The comments panel (1) allows you to add larger bodies of text or guidelines to your topics. Here you can vote the topic, assign it to someone, set its due date or attach files from your computer/Google Drive/Dropbox (under the attachments icon).
Add icons to your topics from the Mindomo gallery (2).
Adding Hyperlinks & Attachments
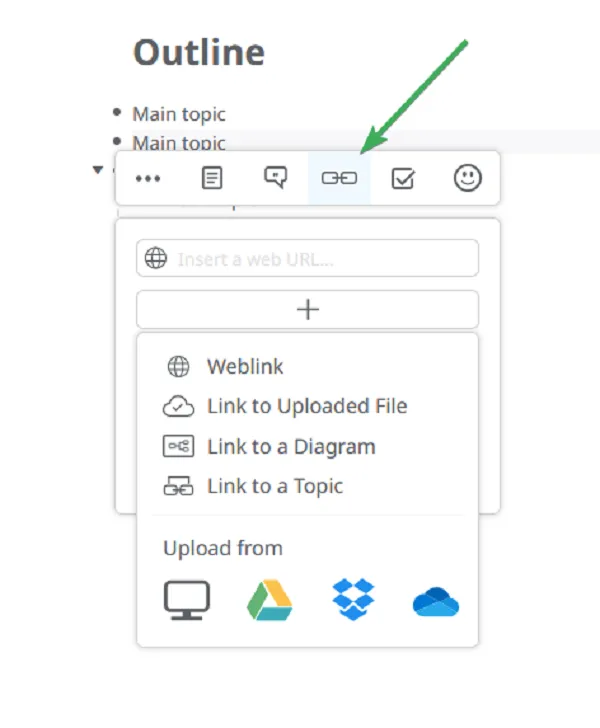
Section titled “Adding Hyperlinks & Attachments”From the Hyperlink & Attachments panel, you can add URL links, files previously uploaded to Mindomo, or links to another map/topic.
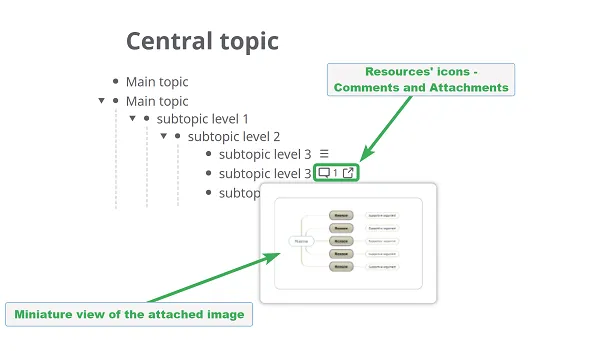
In the outline view, any attachment, URL link or comment you add to a topic will only show up as resources’ icons (a globe for attachments, a text box for comments), next to the topic’s text.
Clicking on the globe icon will open up a miniature view of your attachment.
Managing tasks with outlines
Section titled “Managing tasks with outlines”Set topic as task (Ctrl + K) and a checkbox will be added in front of the topic . Check off the box to set the task as complete. The completed task will now be visible under a checklist icon, which also shows the number of completed tasks it contains.
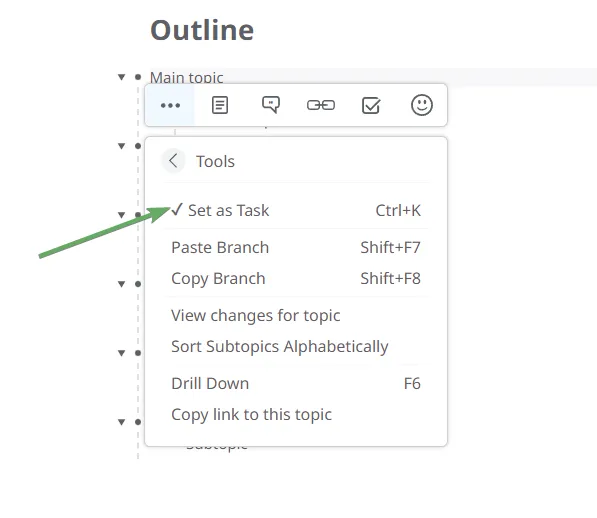
If the main topic has the option Set as task checked off, all its newly added subtopics will automatically inherit it and become subtasks. You can always remove the check mark to keep the newly added subtopics from turning into subtasks. A topic can have both subtasks and normal subtopics hierarchically below it at the same time.
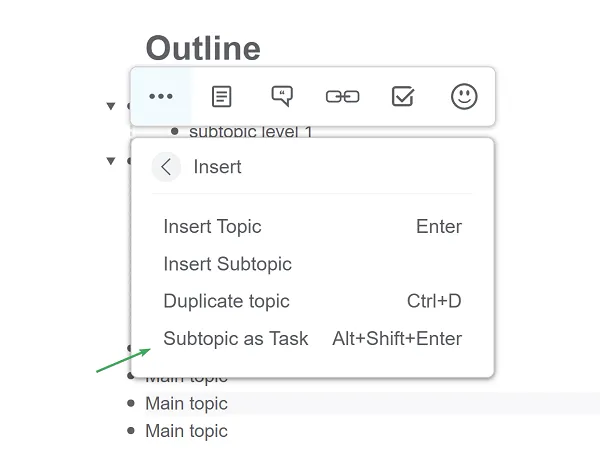
You can also manually insert a task subtopic from the Insert panel (Alt + SHIFT + ENTER).
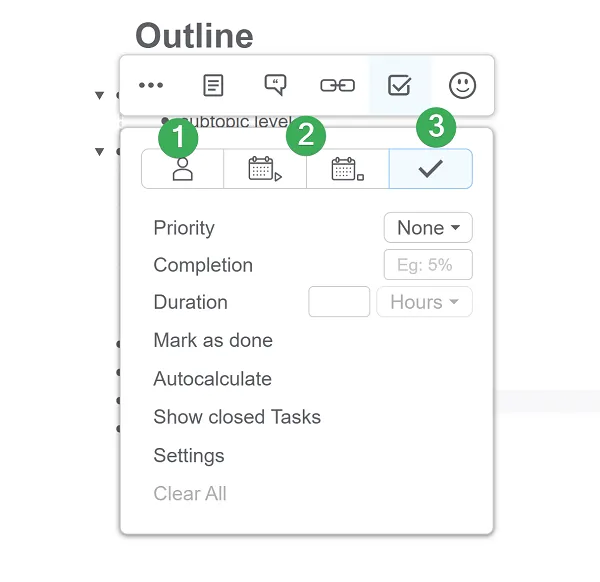
The context menu allows you to assign a topic to someone (instantly turning the topic into a task), and choose a start date/due date for the task (2). A task can be assigned to one or more people (1). Each of the assignees will get notified by e-mail on changes related to task.
Setting a priority for a task and monitoring its completion and duration can also be done from the context menu of each task topic (3).
Recurring tasks
Section titled “Recurring tasks”To set a recurring task right-click next to a topic and from the context menu that opens up select the calendar icon.
The calendar will open on the due date section. Select the day when your recurring task has to start, for example, 19th of August 2020.
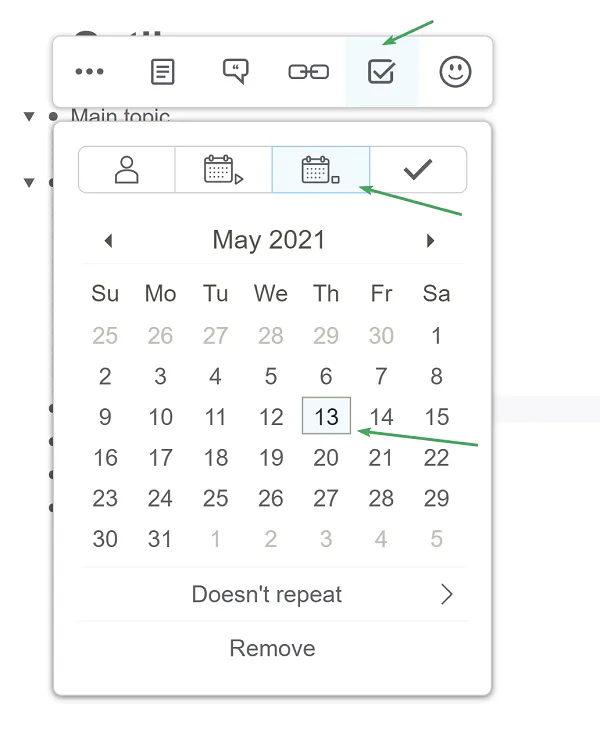
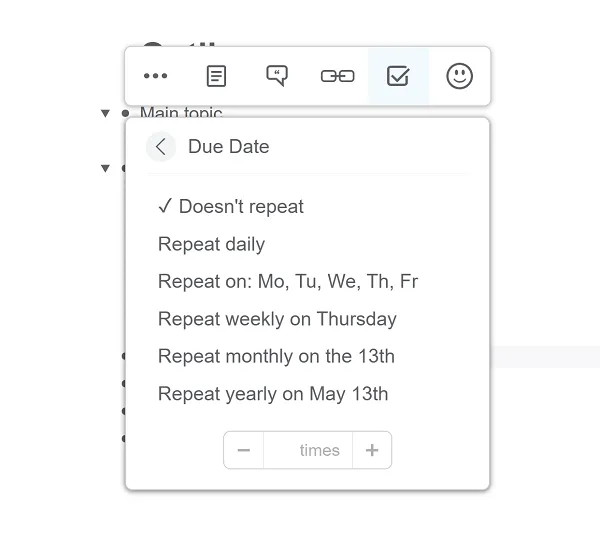
Under the calendar, at the drop down menu you can choose to repeat it:
-
Daily
-
On working days
-
Weekly
-
Monthly
-
Yearly
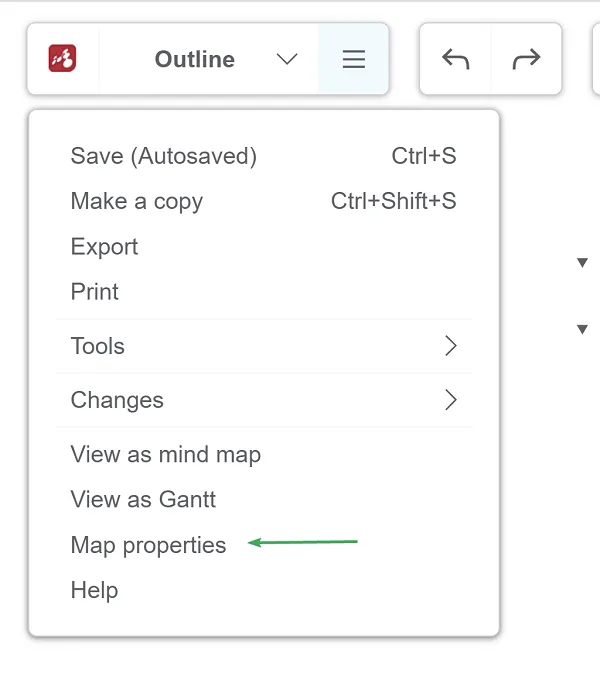
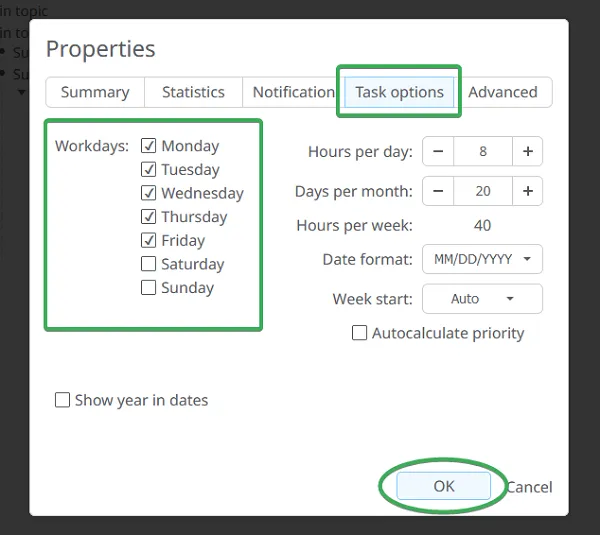
To change the default settings of the working days click on the File list menu from the top-left corner and select Map properties.
From the Map Properties panel select Task options and choose the days which you would like to set as workdays and click OK.
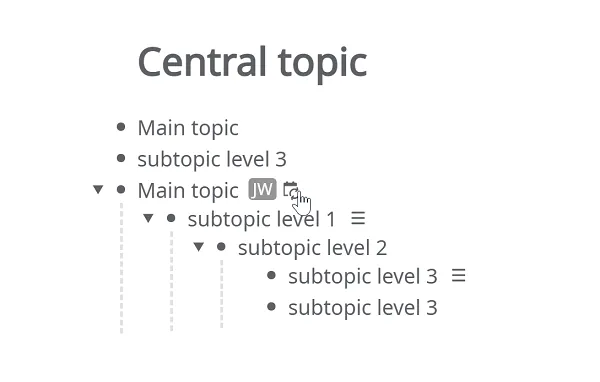
Recurring tasks will have a different icon and you can see the frequency of repetition of a task if you hover over it.
Search inside an outline
Section titled “Search inside an outline”You can look for specific content within your outline, using Search and Filter options.
With Search option, all search results will be highlighted in yellow.
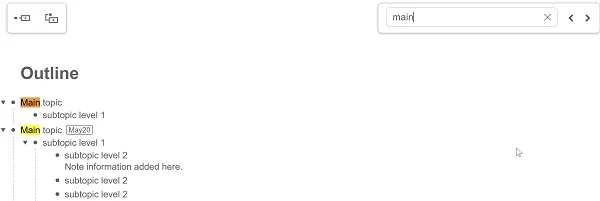
Mindomo supports wildcards, represented as an asterisk (*) and they can appear anywhere in a searched term. An asterisk used at the end of the word will match all results with words beginning with that sequence. If used at the beginning of the word, it will match all sequels that contain or end with it.


For example, if you look for ‘subtopic level’, the search results will highlight either ‘subtopic’ or ‘level’. But if you want to search for both words in the same context (the same topic or note), then use the ’+’ (plus) in front of every word of the phrase (+subtopic +level) and the search will go through the outline, look for both phrases that contain ‘subtopic’ and ‘level’ and highlight them.

Filter by Hashtag & Icons
Section titled “Filter by Hashtag & Icons”The hashtag helps you tag words in a topic and allows you to find specific content easier. You will be able to see accurate matches for your search or results that feature individual phrases in your search.
To add a hashtag type # and your word right after that. It should look like this #online then press Enter.
The hashtags will be automatically displayed in the filtering bar, where you will see how many times it appears in your outline.
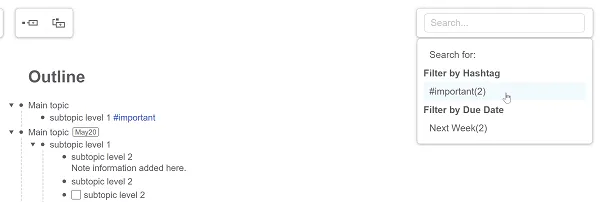
If you filter by hashtags, the results will show you the topics that contain them and all the subtopics related to the task, even if they don’t contain hashtags.
You can also filter by symbols, which will be shown in the filter bar, under the hashtags.
![]()
iCal task feed
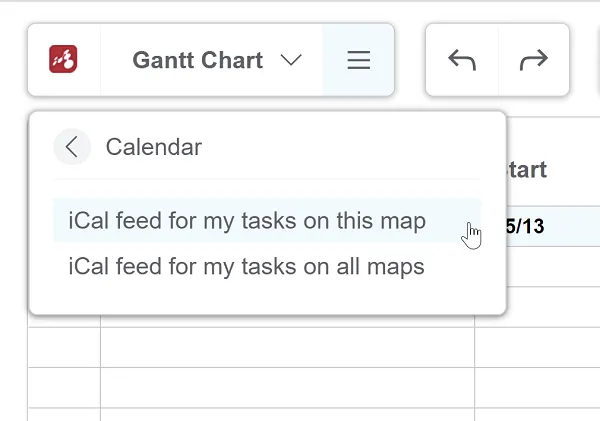
Section titled “iCal task feed”To get the iCal feed for your outline, go to the file list menu, and switch to Gantt view. You will then find the Calendar option from the file list menu where you can access the iCal feed for this outline.
Turning an outline into a mind map or a Gantt
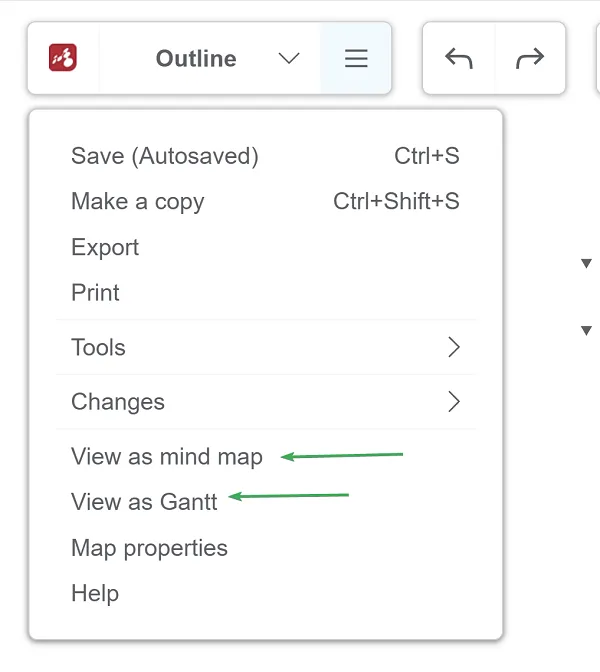
Section titled “Turning an outline into a mind map or a Gantt”- Go to the file list menu on the top-left side
- Click on View as mind map or View as Gantt. The outline will open in mind map or Gantt mode.
You also have the possibility to set the default view as mind map or Gantt:
- Go to the file list menu on the top-left side
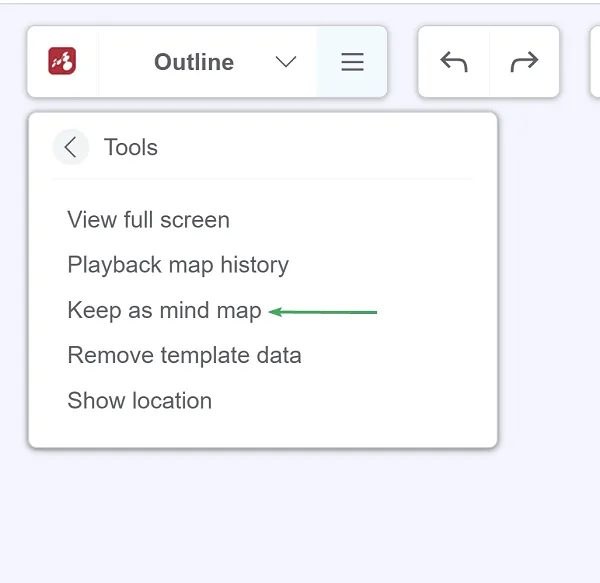
- Click on Tools
- Select Keep as mind map or Keep as Gantt to change the default view of your outline.
