Moodle Integration
This guide explains how to add Mindomo as an external LTI tool in Moodle, enabling seamless integration for teachers and students. Once configured, users can access Mindomo dashboards, mind maps, and assignments directly within Moodle without needing separate logins.
Add Mindomo as an external tool
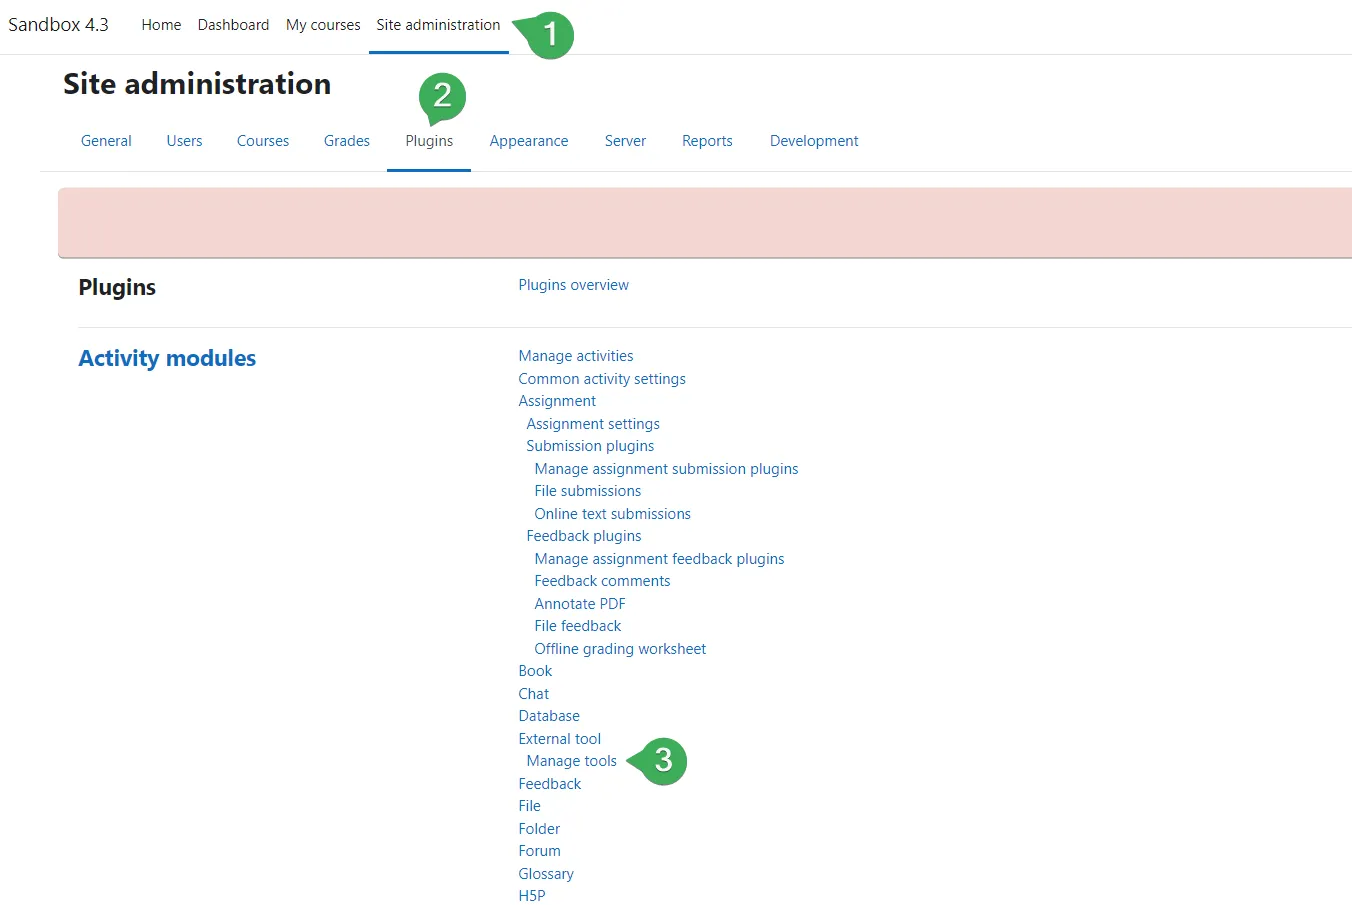
Section titled “Add Mindomo as an external tool”Step 1. The Moodle Site Administrator has to go to Site Administration (1), then to Plugins (2), then under Activity modules, click on Manage tools (3).
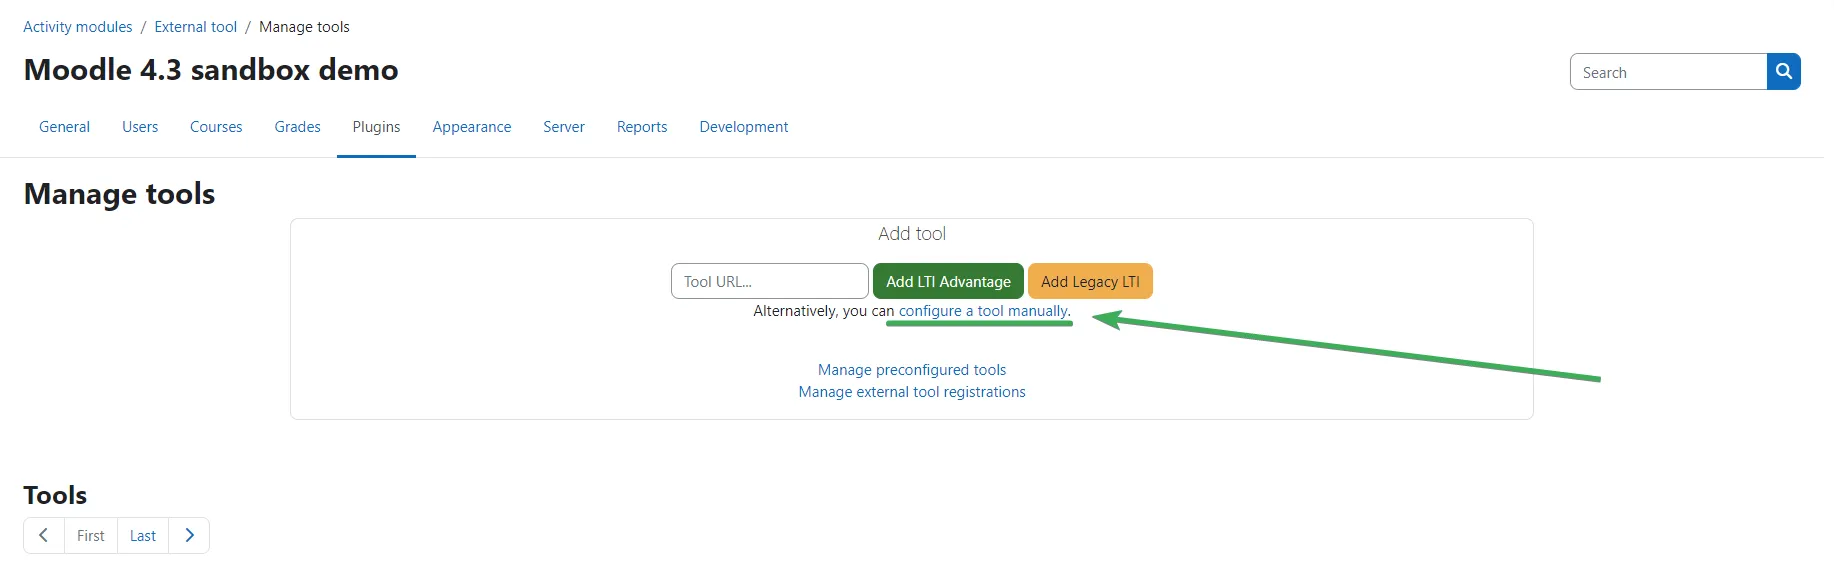
Step 2. Click on the Configure a tool manually option.
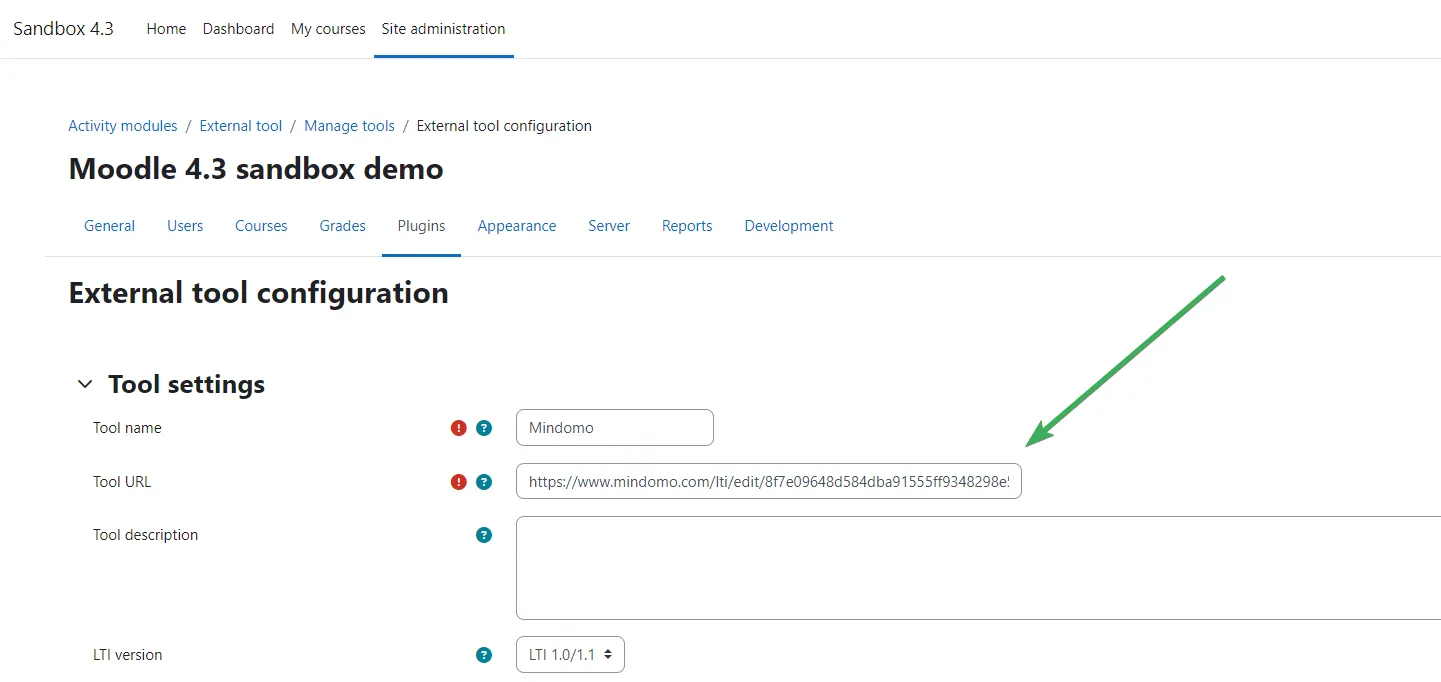
Step 3. Type Mindomo in the Tool name field (4), add the Tool URL https://www.mindomo.com/lti/index (5), add the Consumer Key and Shared Secret provided by Mindomo (6), and save the changes.
Then, under Tool configuration usage (7), choose the last option: Show in activity chooser and as a preconfigured tool.

The Consumer Key and Shared Secret can be found in the School Administration section of your account, under Settings: https://www.mindomo.com/school#settings.
Optional step
You can add the Mindomo logo by clicking Show more… in the Tool settings section to reveal the Icon URL field. Insert a link to the logo image to easily identify the tool.
Step 4. In the Privacy section, make sure both Share launcher’s name with tool and Share launcher’s email with tool are set to Always.

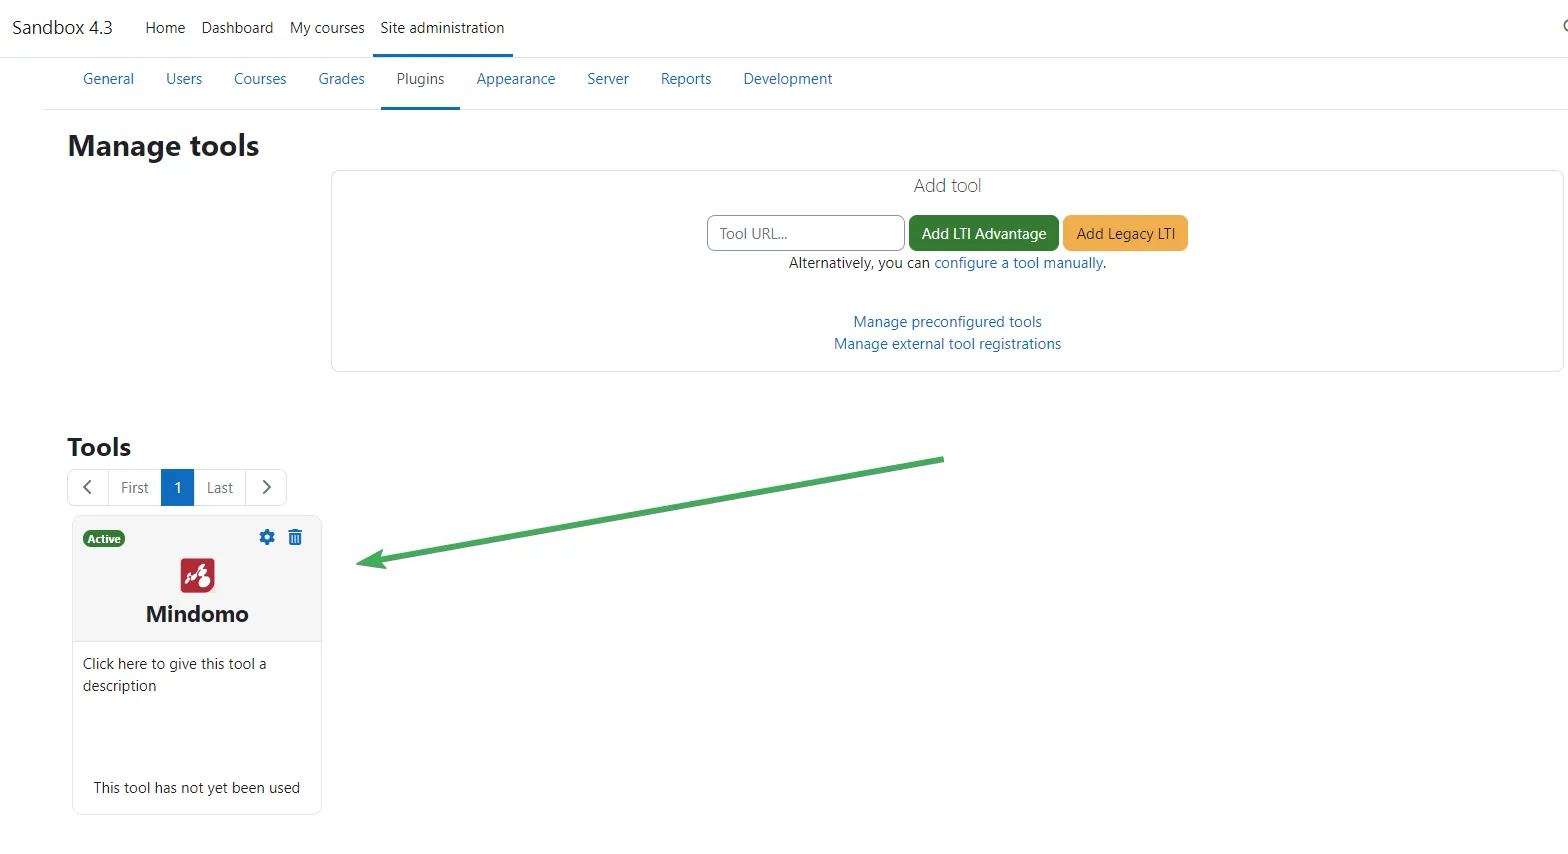
Step 5. Click Save changes. Mindomo will now appear as an active tool.
Working with Mindomo
Section titled “Working with Mindomo”Direct Access
When teachers and students access Mindomo from Moodle, their Mindomo accounts are automatically created, allowing them to start mind mapping without any additional login.
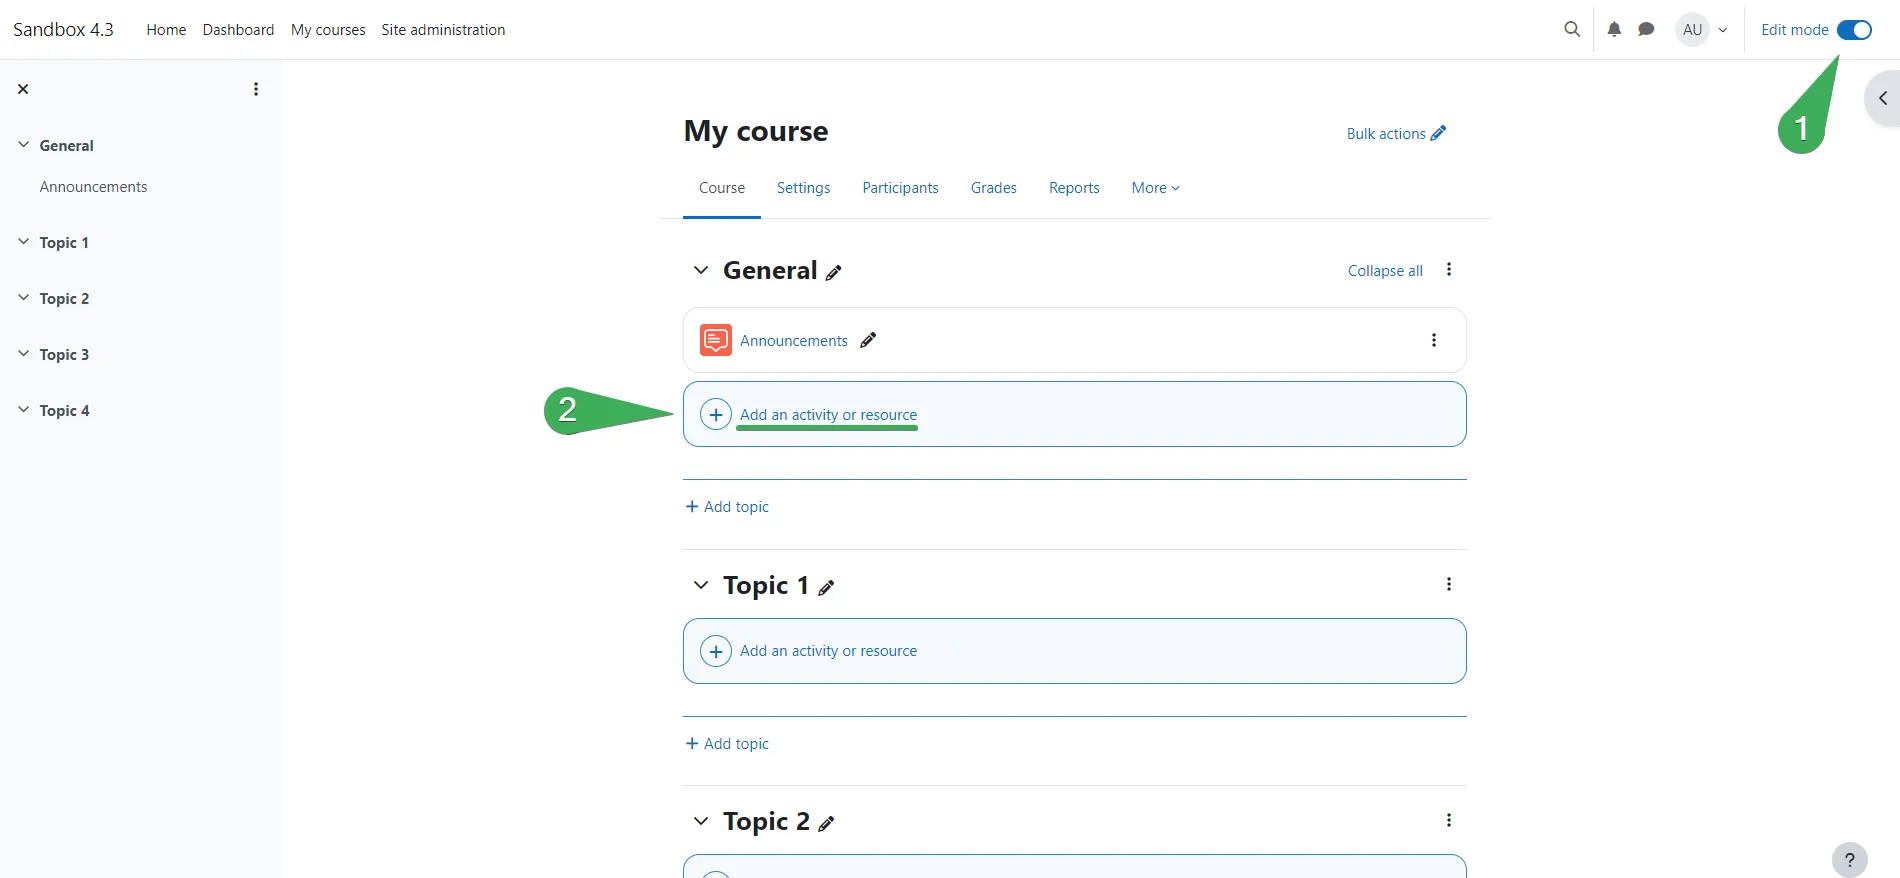
Step 1. Before adding the Mindomo dashboard (or an assignment or diagram) to a Moodle course section, make sure editing mode is enabled (1).
Adding Mindomo to Moodle allows users to work directly from the course without logging in separately. If a user does not already have a Mindomo account, one is created automatically when they access the Mindomo link.
Click Add an activity or resource (2).
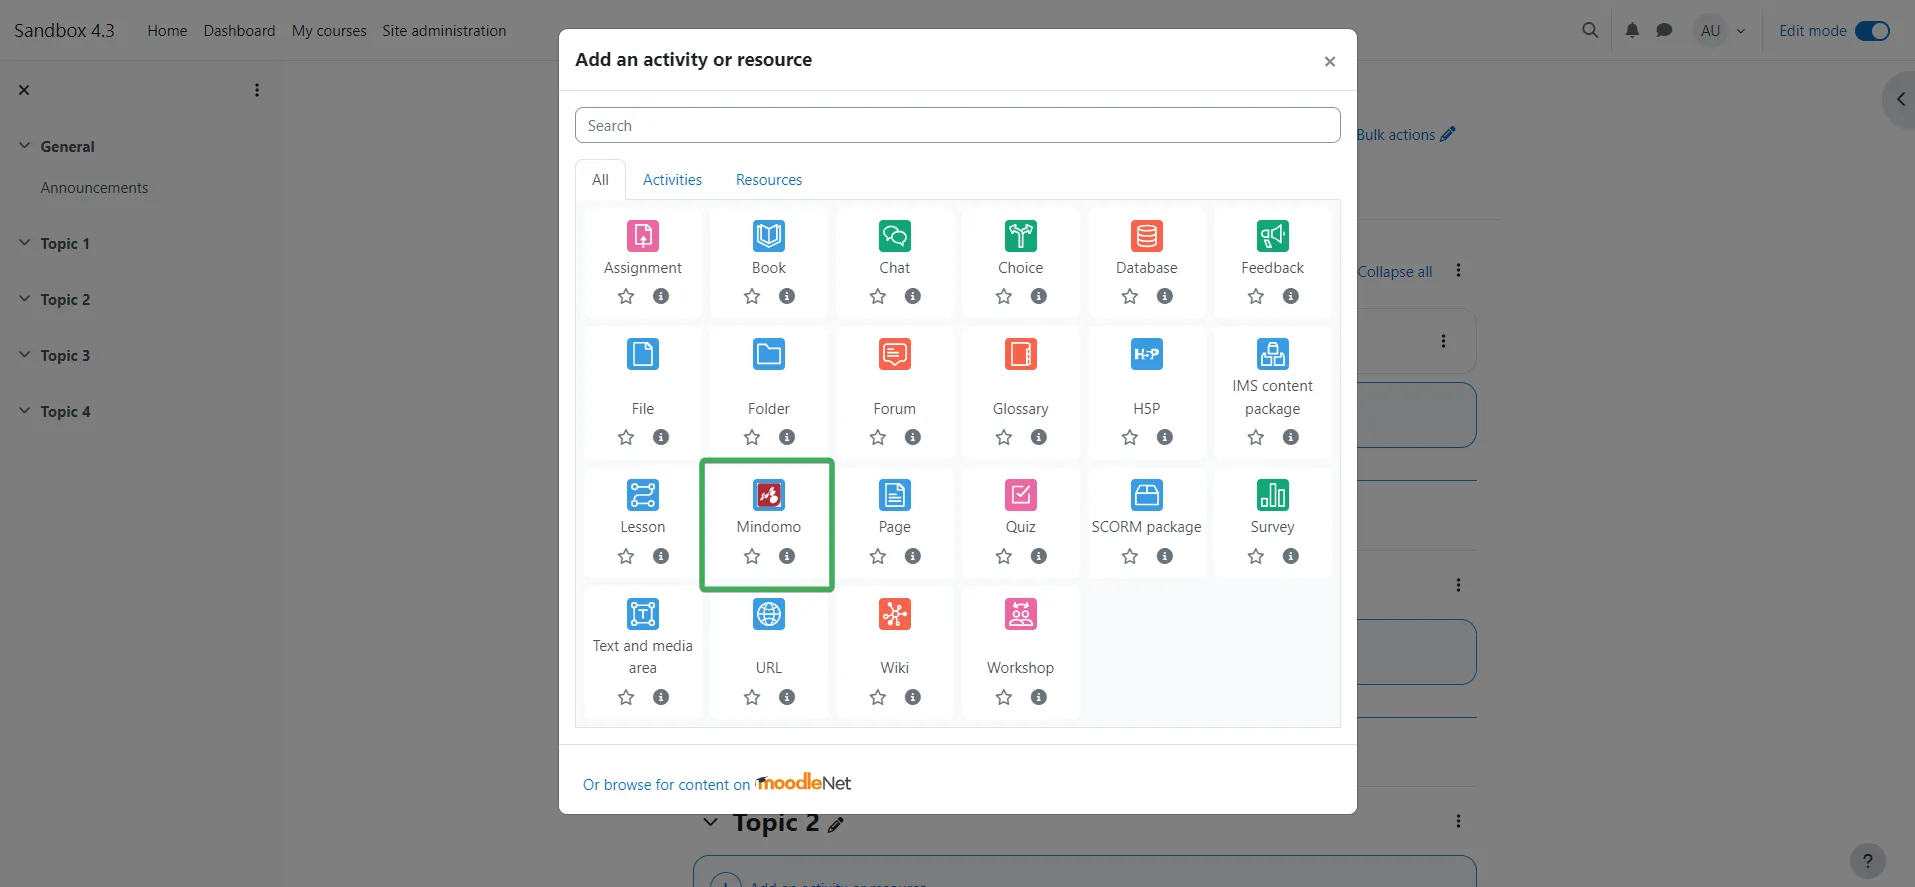
Step 2. Find Mindomo in the list and click on it.
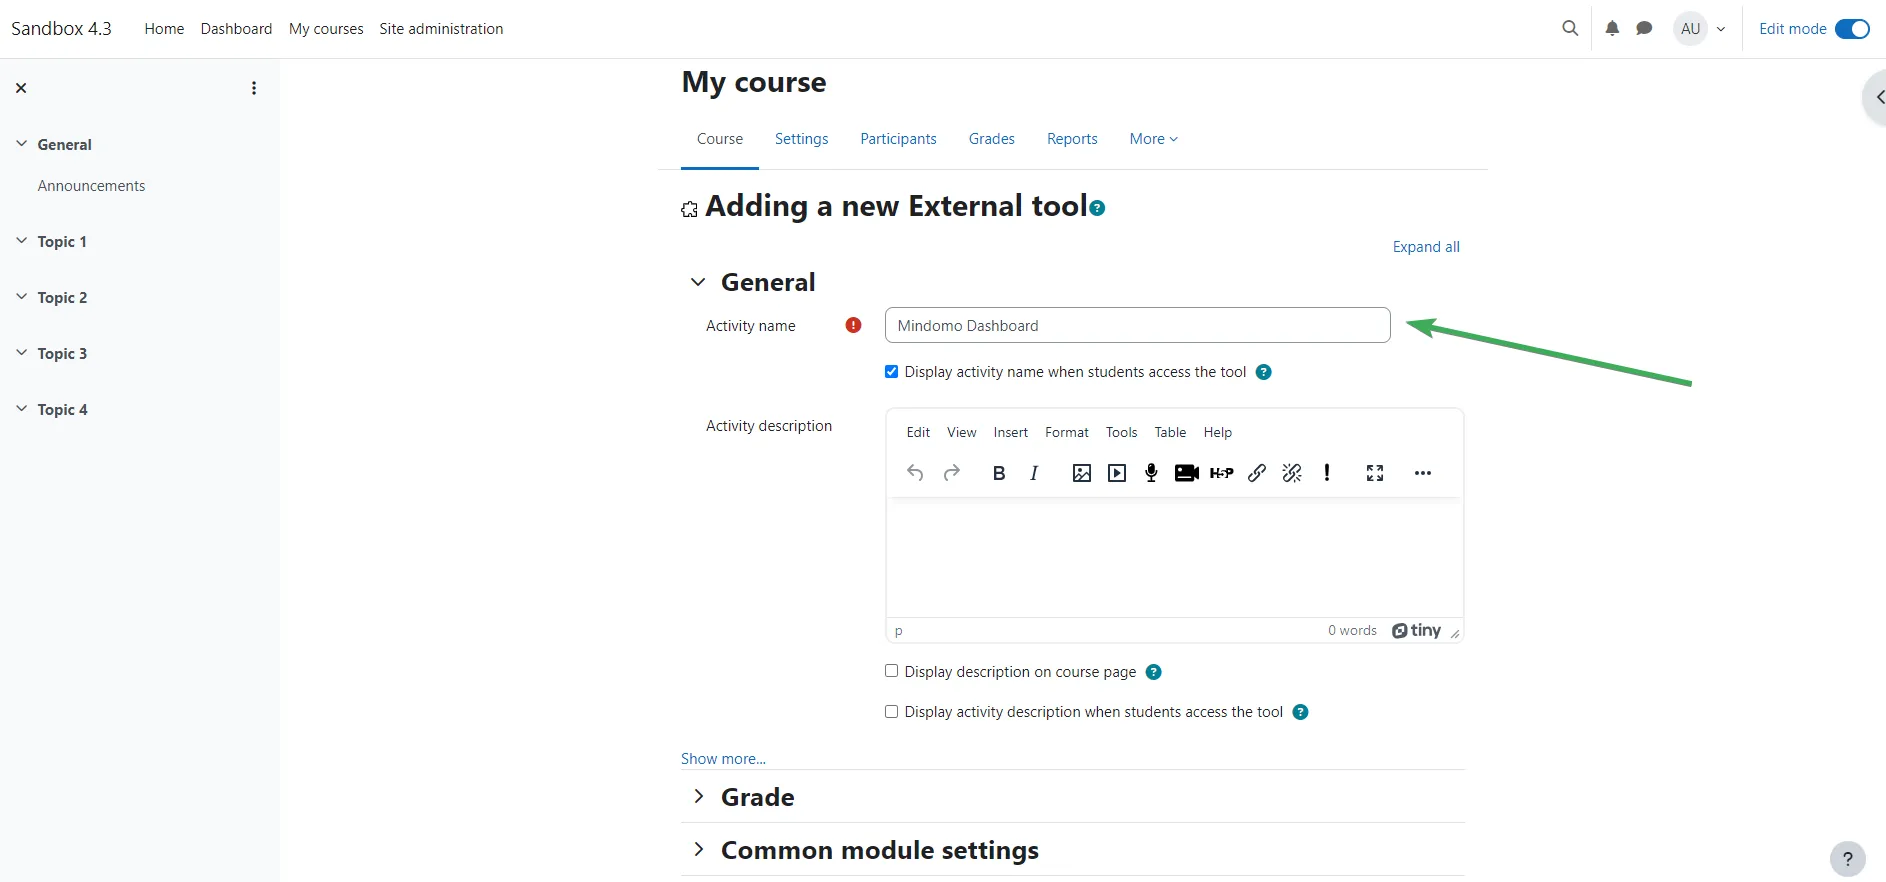
Step 3.
- Enter a name (for example, Mindomo Dashboard) in the Activity name field.
- Click Save and display.
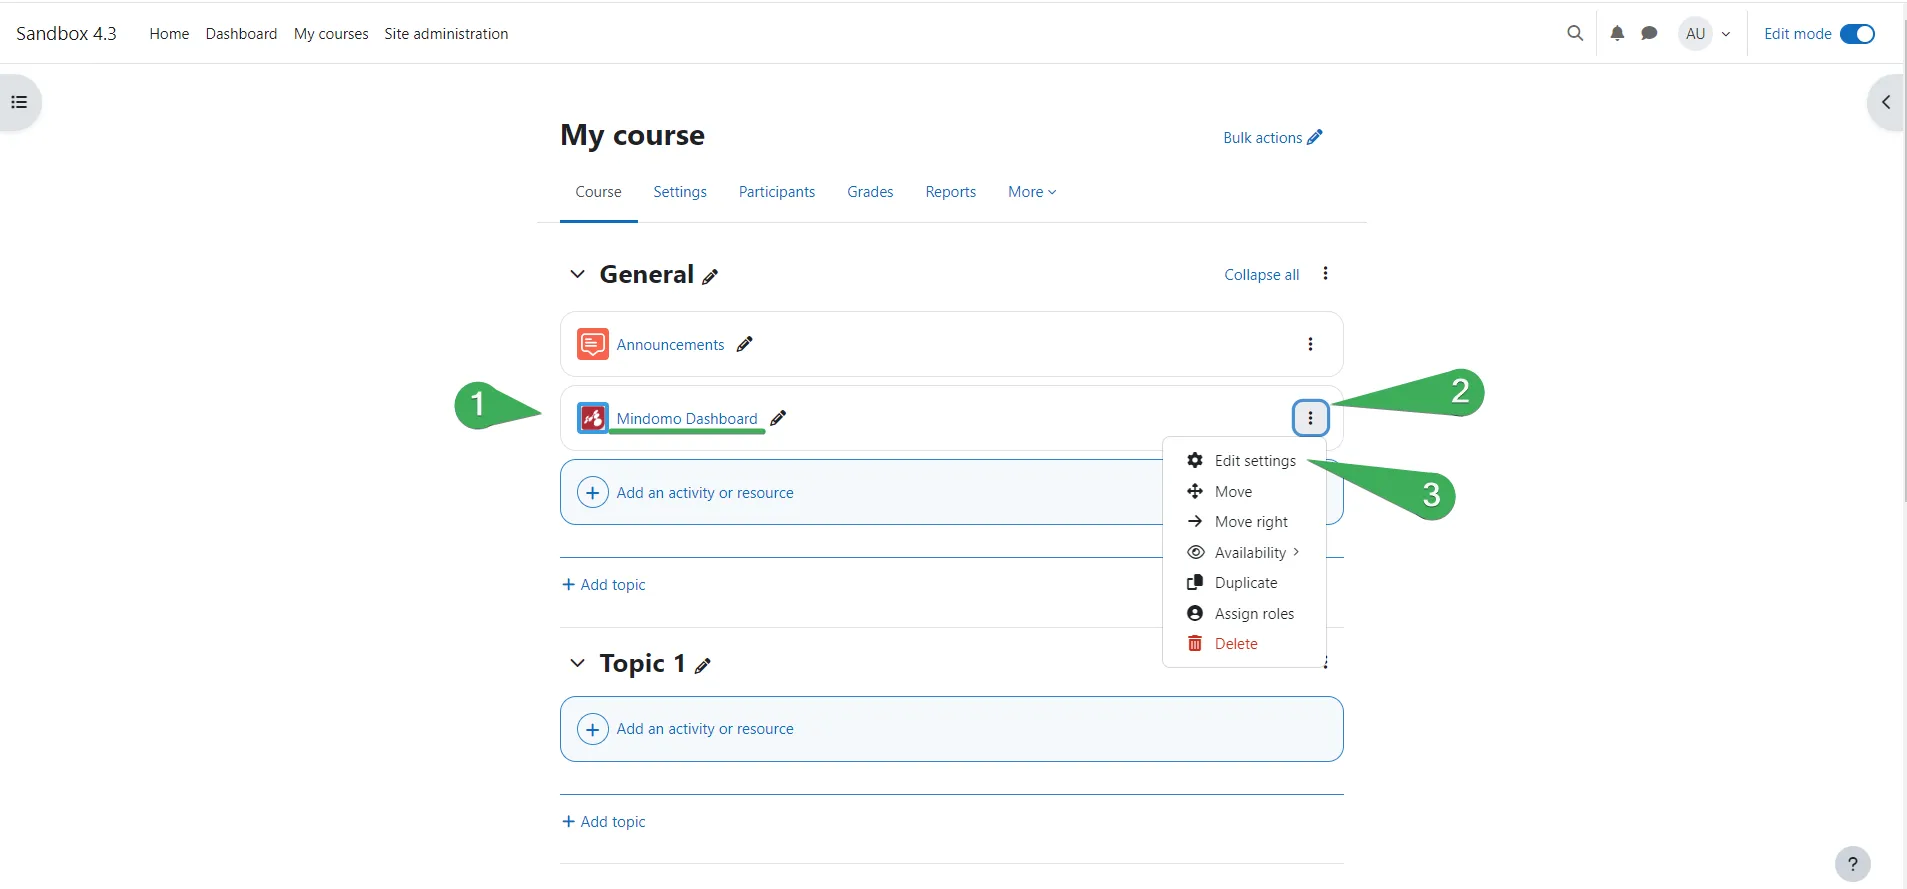
Step 4. The Mindomo link will appear in the course section (1). You can edit it whenever necessary (2/3).
Attach mind maps to courses
You can add mind maps to your Moodle courses so students can view or edit them without creating Mindomo accounts or logging in independently.
This method of attaching a mind map to your Moodle course is different from embedding it.
While embedding:
- The map must be public (accessible to anyone with the embed link).
- The map can only be viewed, not edited.
While attaching a map through LTI:
- The map remains private, and only users enrolled in the Moodle course can view or edit it.
- If users do not have Mindomo accounts, new accounts are created automatically when they access the map.
You can choose whether users can view or edit the map. Only course participants will be able to access it.
Add a viewable mind map
To add a viewable mind map, configure a Mindomo external tool using the following Tool URL:
https://www.mindomo.com/lti/view/mapID
Follow the same configuration steps described above.
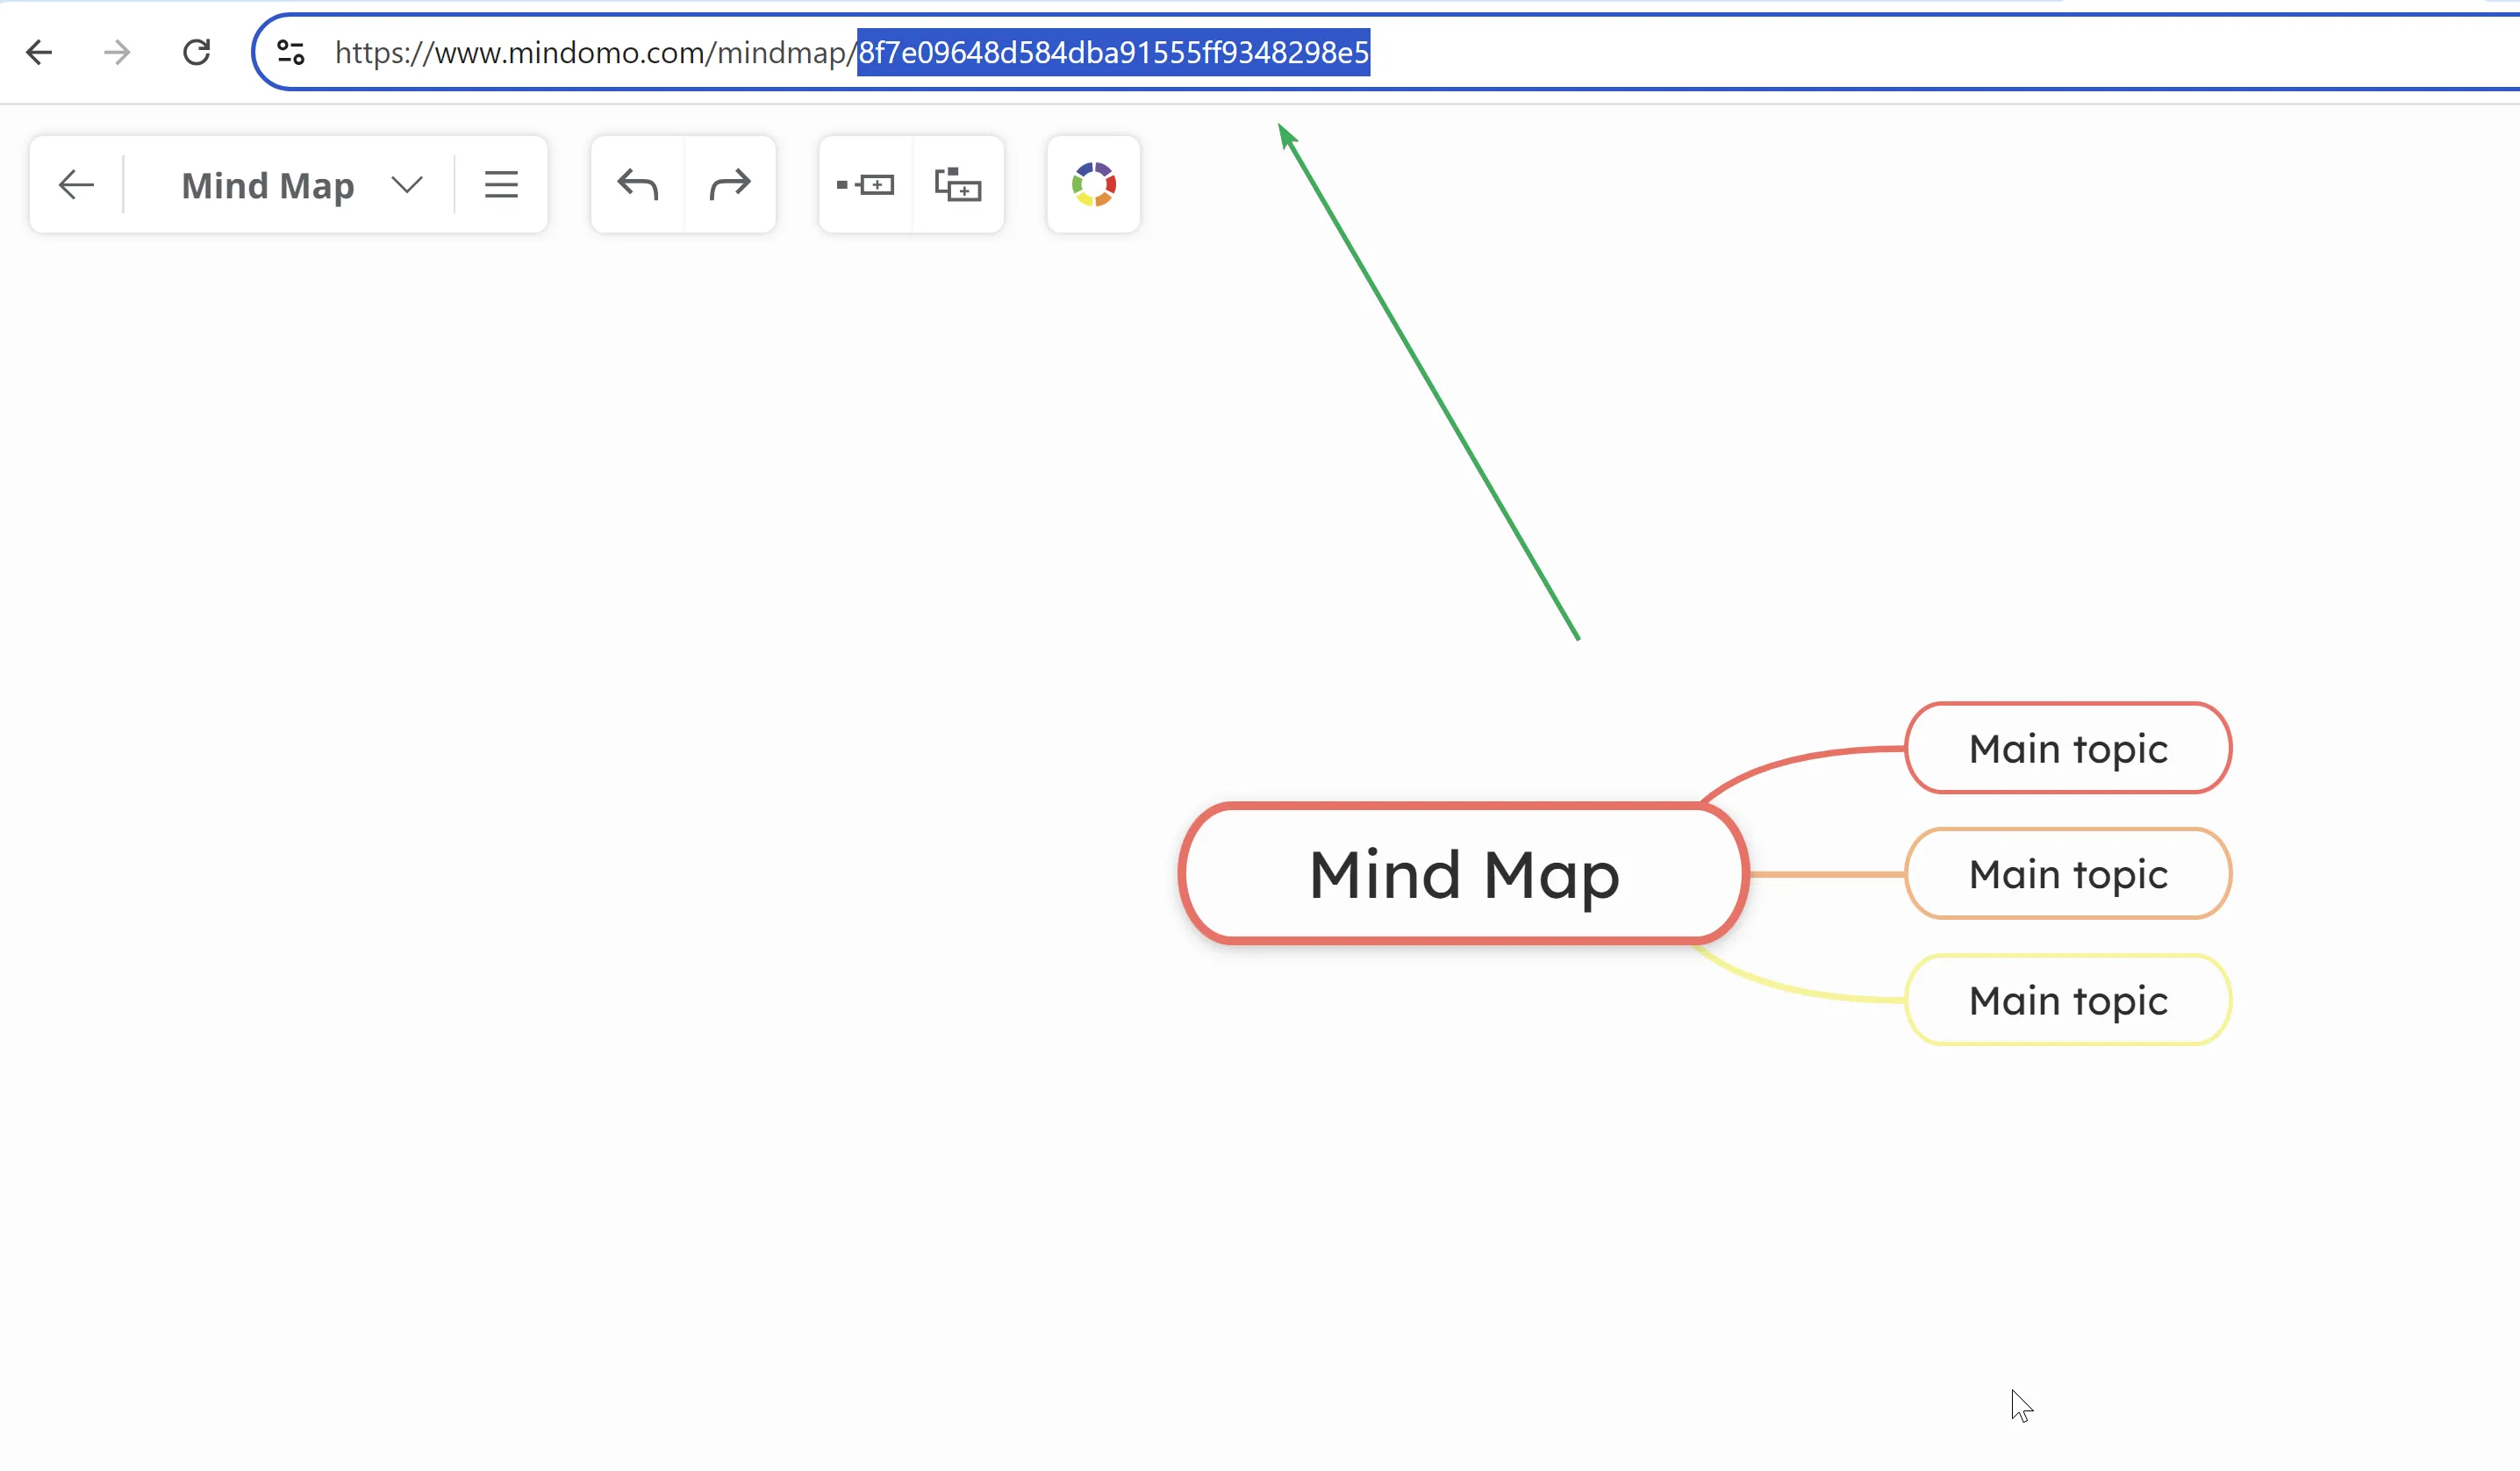
The map ID is the final sequence of letters and numbers in the mind map URL, after the last /.

After saving the changes, the map link will appear in the course section. Users will be able to view the map directly from Moodle.
You can edit the configuration whenever necessary.
Add an editable mind map
To add an editable mind map, configure a Mindomo external tool using the following Tool URL:
https://www.mindomo.com/lti/edit/mapID
Follow the same configuration steps described above.
The map ID is the final sequence of letters and numbers in the mind map URL, after the last /.
After saving the changes, the map link will appear in the course section. Users will be able to edit the map directly from Moodle.
You can edit the configuration whenever necessary.
Mind Map assignments
Students can work individually or in groups to create mind maps related to subjects covered in your Moodle courses. They can work on assignments directly from Moodle without creating accounts or logging in separately. Once students begin their assignments, teachers can access and grade their maps directly from Moodle.
You can create and share mind map assignments that are automatically shared with teachers enrolled in the course.
To add an assignment, configure a Mindomo external tool using the following Tool URL:
https://www.mindomo.com/lti/assignment
Follow the same configuration steps described above.
The assignment link will appear in the course section. You can edit the configuration whenever necessary.
Work on a mind map assignment
As a course owner, accessing the assignment link allows you to create and share a mind map assignment with students and other teachers.
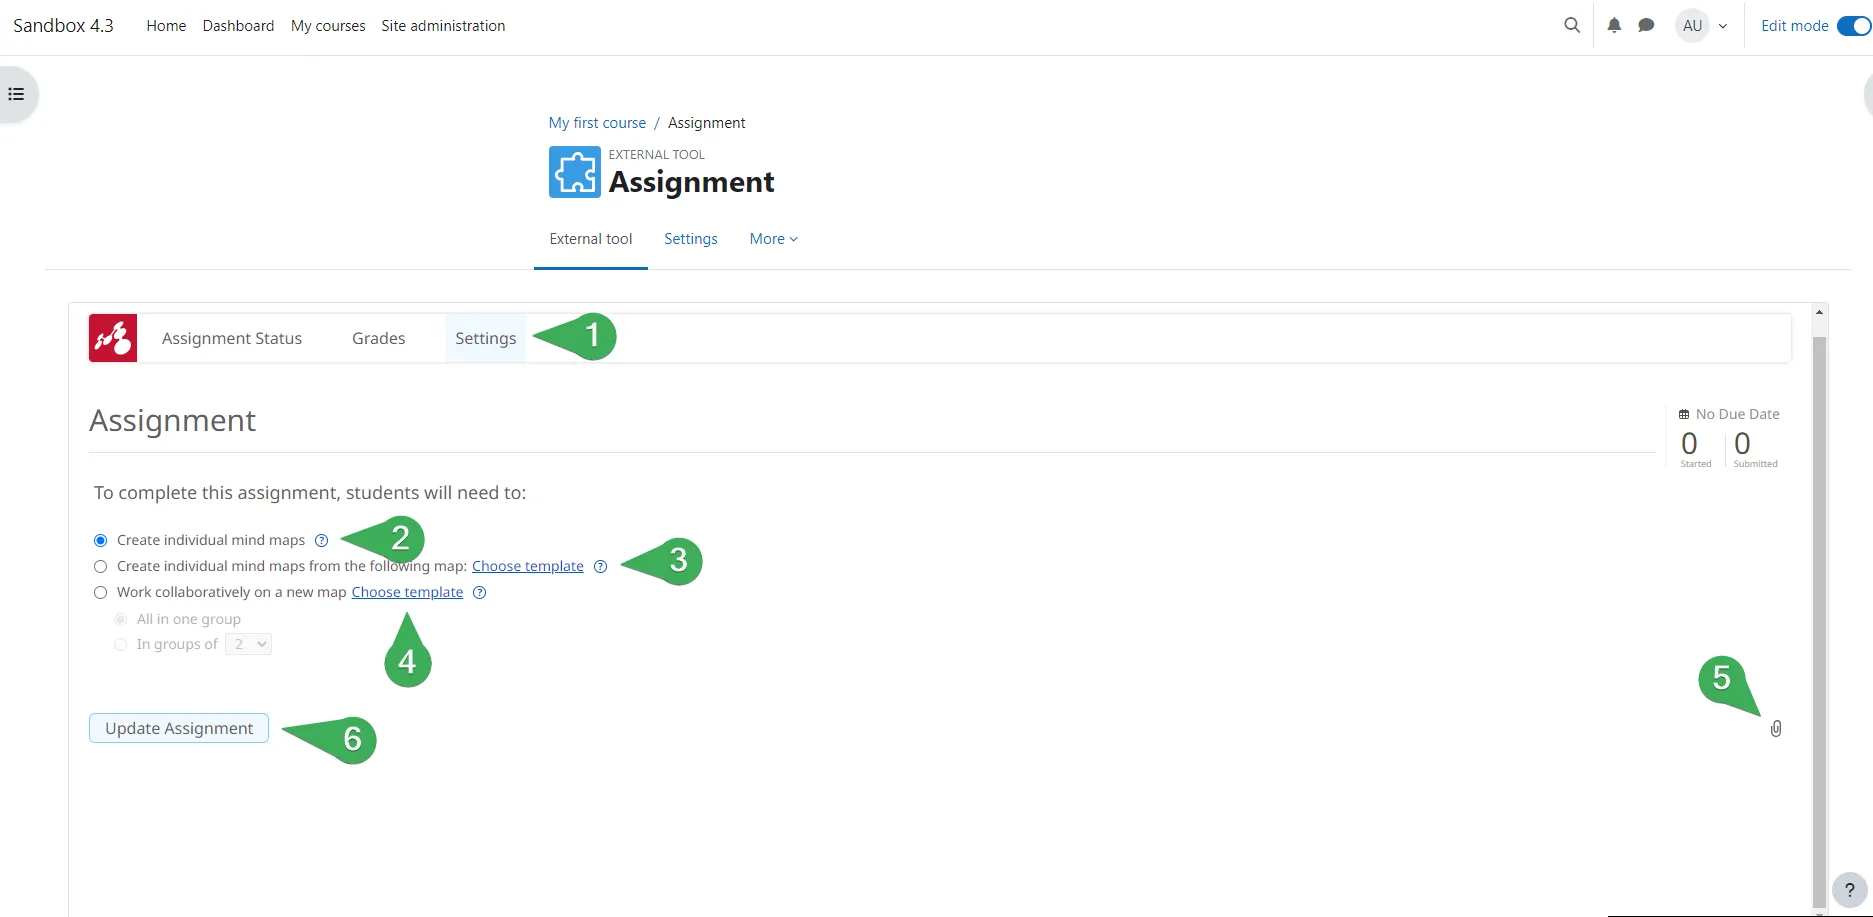
Step 1. The assignment opens in the Settings section (1), where you can configure it.
Step 2. Choose one of the assignment types:
- Each student submits an individual mind map (2).
- Students submit individual maps using a shared starter map (3). Click Choose to select the map.
- All students collaborate on a new map or edit a shared map (4).
- You can attach resources to the assignment at any time (5). When finished, click Update Assignment (6).
Once you click Update Assignment, the assignment is created in both Moodle and Mindomo. If the Moodle course does not exist in Mindomo, it is created automatically.
For more information, see the Mindomo Help page:
https://help.mindomo.com/assignments/mindomo-assignments/
How will students work on their mind map assignments
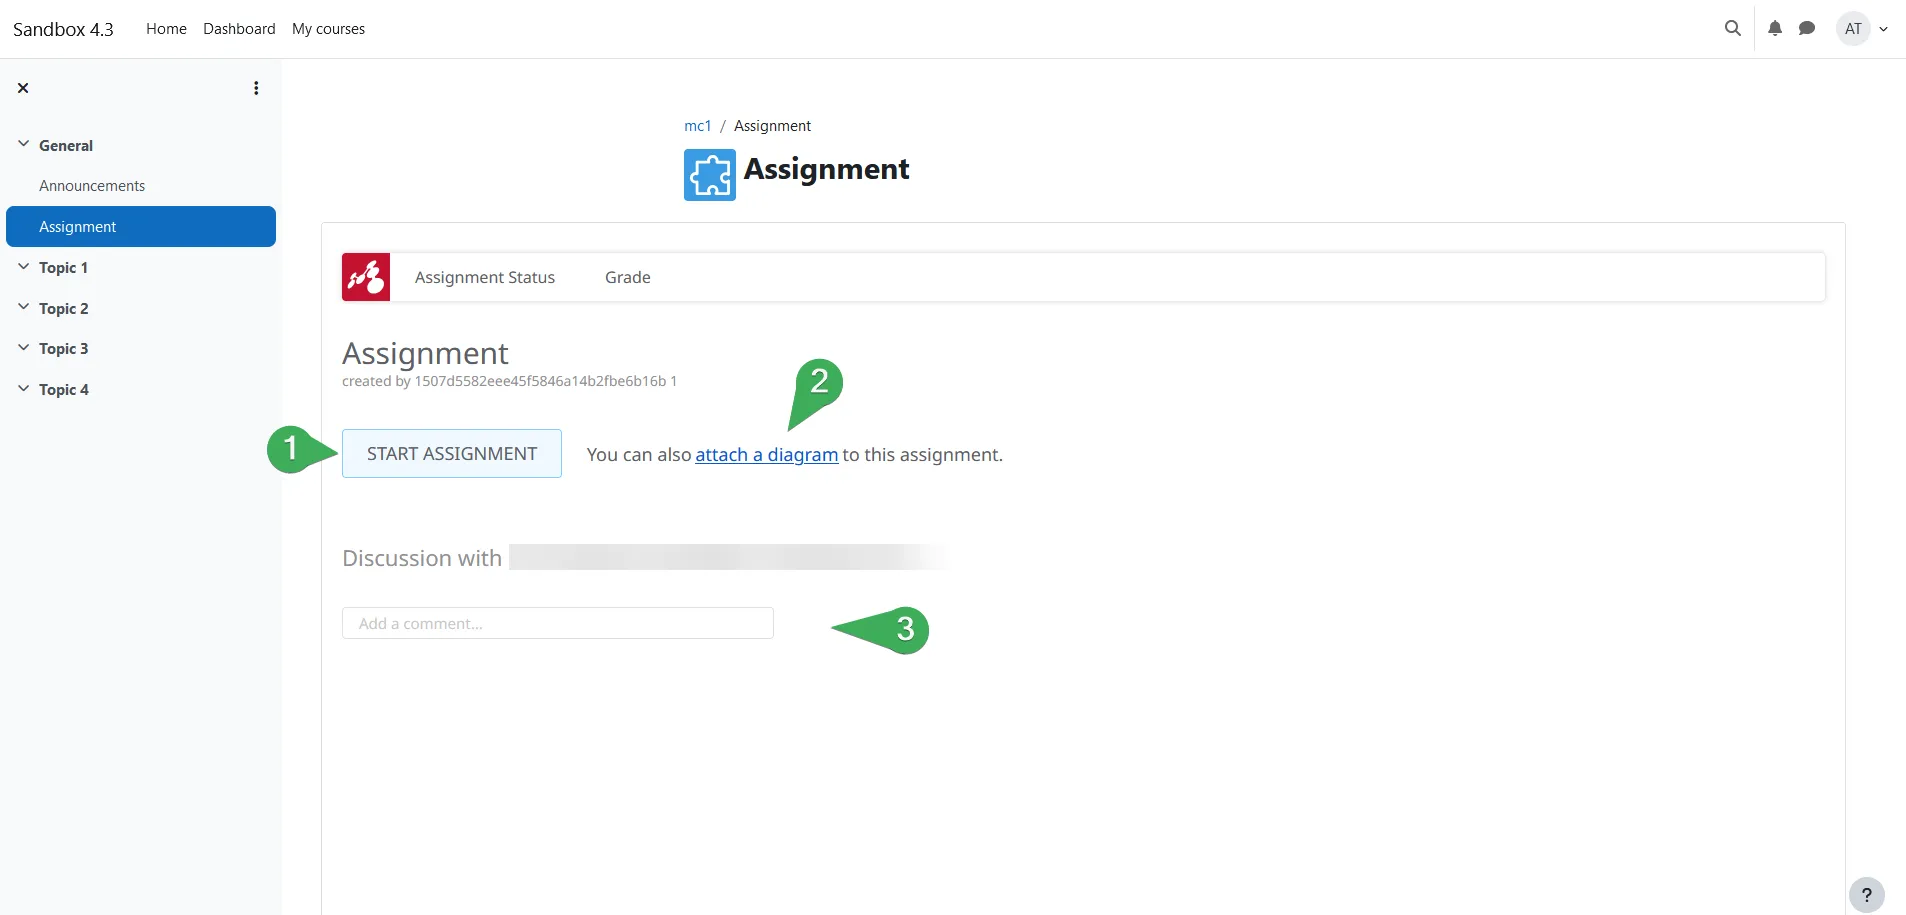
When students access the assignment link for the first time, they can:
- Start the assignment (1).
- Attach another mind map (2).
- Communicate privately with the teacher (3).
When students start the assignment, a new map opens in a separate tab based on the assignment settings, so Moodle remains open.
When returning to an assignment already started, students click Continue Assignment.
For more details, see: https://help.mindomo.com/assignments/assignments-for-students/