

Adding students to a class
Students belong to a class, not to a single assignment. However somebody gets in (they read a code off the projector, they click an email invite, you create an account for them), they land on that class’s roster and they are in every assignment that class has, the ones you have already published and the ones you publish next term.
All of it lives behind one set of controls, reachable from two places: a class page’s How students join and Co-teachers tabs, or an assignment’s Share button, which opens Share assignment showing the class it is ASSIGNED TO (1) and the same two tabs (2) below it.
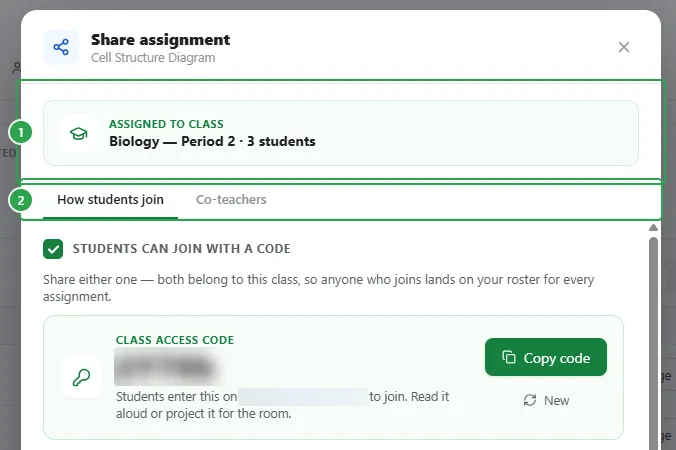
The rest of this page describes the class page. The dialog behaves identically: anything you change in one is in effect in the other, because both are editing the class.
Let students join themselves
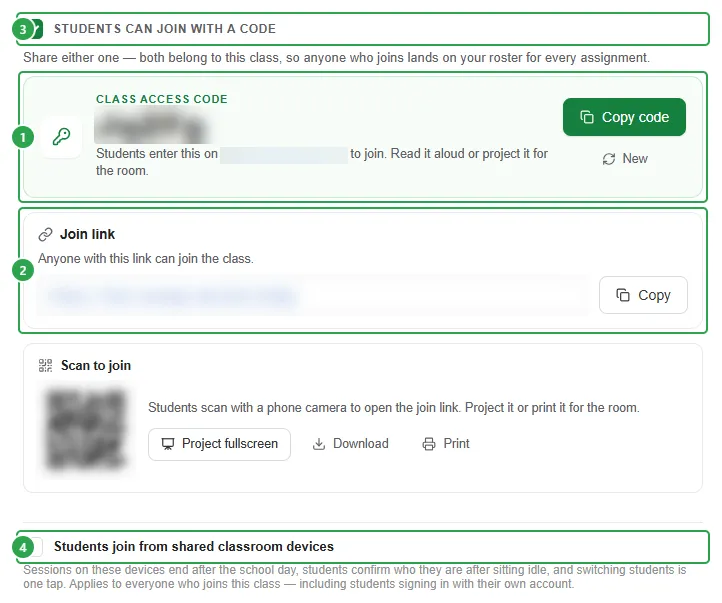
Section titled “Let students join themselves”Open the How students join tab and you’ll see the class access code (1) and the join link (2) waiting for you. They do the same job, so just hand out whichever suits the room: Copy code if you’re pasting the five characters into a message, Copy if you’re sending the link. The card also names the page students type the code into, mindomo.com/join, so you can read that out loud along with the code.
New (next to Copy code) issues a fresh code. The Students can join with a code toggle (3) governs both the code and the link at once, and Students join from shared classroom devices (4) changes how sessions behave for everybody in the class: turn it on and a student’s login is not kept on that device once it is shut off, so the next student to sit down starts fresh instead of picking up where the last one left off.
Scan to join
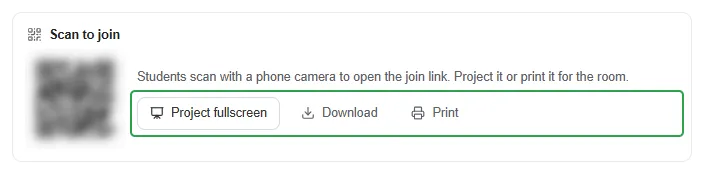
Section titled “Scan to join”The Scan to join card holds the same join link as a QR code. Project fullscreen puts it on the big screen, Download saves the image so you can drop it into a slide, and Print produces a paper copy for the wall. Students open it with a phone or tablet camera.
Turning self-service off
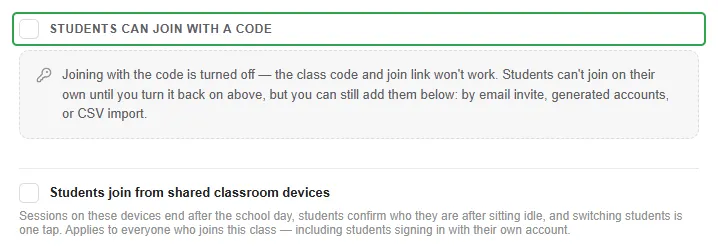
Section titled “Turning self-service off”Switch Students can join with a code off and the code, link and QR cards disappear altogether, replaced by a line explaining what changed: Joining with the code is turned off: the class code and join link won’t work.
Shared classroom devices
Section titled “Shared classroom devices”Students join from shared classroom devices is for computers the whole class shares (a trolley of laptops or a lab bench) rather than personal devices. Turn it on and three things change: sessions on those devices end automatically at the end of the school day, a student who has sat idle for a while has to confirm who they are before carrying on, and moving to the next student takes one tap. This applies to everyone who joins the class this way, even a student signing in with their own personal account.
Add students yourself
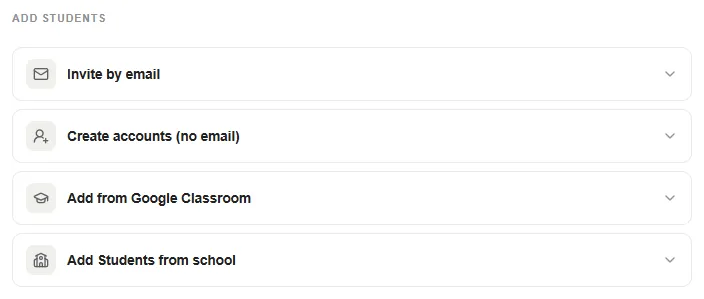
Section titled “Add students yourself”Under ADD STUDENTS are four ways to put students on the roster without them doing anything. Each one is a row that opens when you click it.
Invite by email
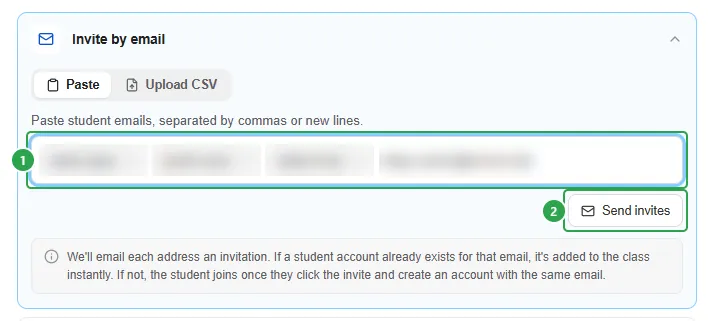
Section titled “Invite by email”Paste addresses into the field (1), separated by commas or new lines, and each one turns into a chip as you go. Then Send invites (2).
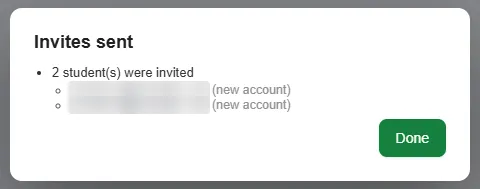
A summary dialog counts what happened and lists every address, each tagged with the outcome: (new account) for an address Mindomo has not seen before. The row’s own note explains the difference the tags record: an address that already has a Mindomo account is added to the class instantly, and everyone else joins once they click the invitation and create an account with that same address.
Create accounts (no email)
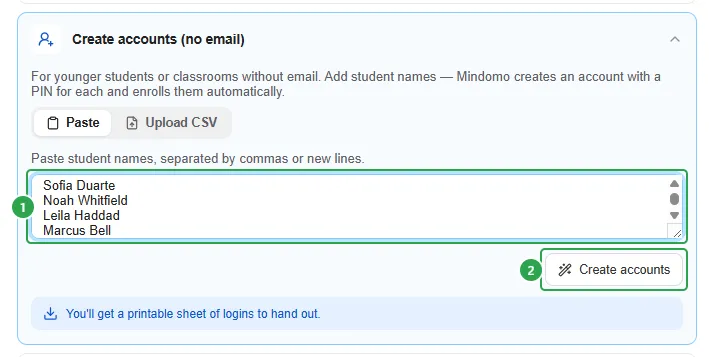
Section titled “Create accounts (no email)”This row exists for classrooms where students do not have an email address: often younger students, but not only them. Paste names instead (1), again separated by commas or new lines, and Create accounts (2) makes one account per name, each with its own four-digit PIN, and enrols them all in the class.
You get a sheet of names and PINs back, with Download CSV (1) and Print (2).
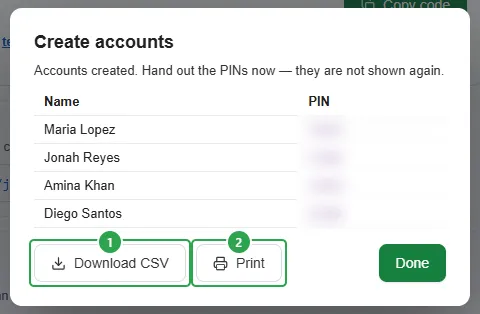
A name that is already on the roster is skipped rather than duplicated, and the sheet says so above the table: 1 name(s) were already in this class and were skipped.
Import a CSV
Section titled “Import a CSV”Invite by email and Create accounts (no email) both have an Upload CSV mode (1) alongside Paste, with the same drop zone (2): drag a file onto it or click Choose a file. The file wants one entry per row: one email, or a column named email, for invites; one name per row, or comma-separated, for accounts. It may be up to 5 MB.
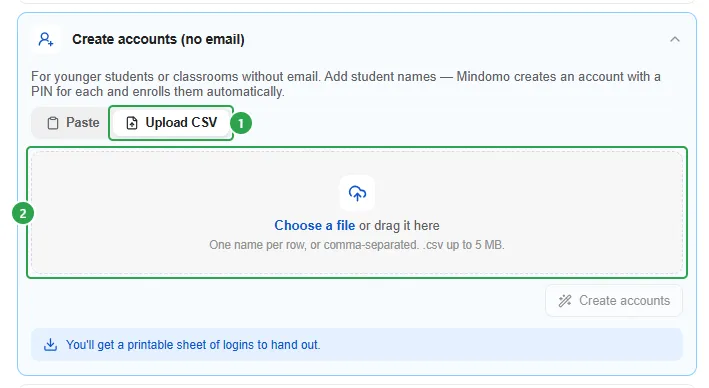
Choosing the file starts the import; there is nothing else to click. A card appears above the roster tracking it, and the roster fills in underneath while it runs, so you can carry on working or close the dialog and come back.

A names import ends the same way a pasted list does, with the PIN sheet, and the finished card carries a View logins action for as long as it is on screen. The card goes away once you dismiss it, so treat that as the same one chance to save the PINs.
Add from Google Classroom
Section titled “Add from Google Classroom”If your roster already exists in Google Classroom, this row imports it. The first time, Connect Google Classroom sends you through a Google sign-in and returns you to this same page; after that you pick one of your Google Classroom courses and bring its students across. See Google Classroom for what else the integration does.
Add Students from school
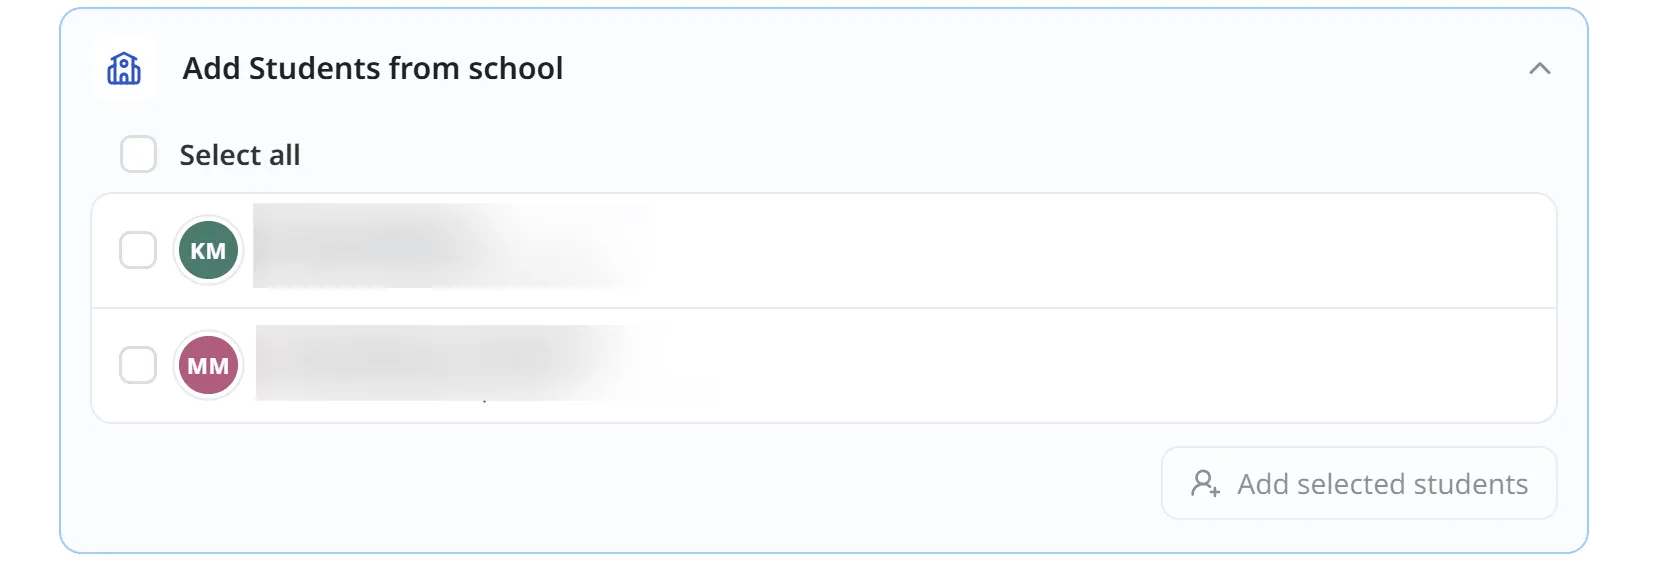
Section titled “Add Students from school”School accounts get a fourth row that draws on the roster your school administrator maintains (including students with PIN accounts), so students who already exist in the school do not have to be created twice. Pick students one by one, or click Select all if you want the whole school roster added at once. If nobody has been added to the school yet, the row says so: You haven’t yet added students to this school. School administration covers filling it.
Checking who’s joined
Section titled “Checking who’s joined”Whichever route they came by, students land on the class’s Students tab. An email invite sits at Invited (1) until the student accepts it; anyone who is actually in the class reads Joined (2). Accounts you created show No email (PIN account) where the address would be.
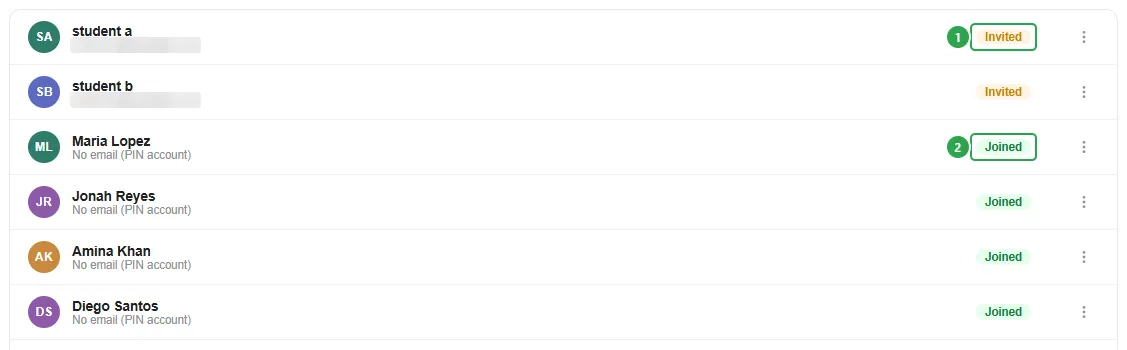
Selecting rows puts a bar at the top of the list with Select all, Reset PIN and Remove from class. Removing a student keeps their assignment work.
Co-teachers
Section titled “Co-teachers”The Co-teachers tab invites colleagues the same way the student rows do: addresses into the field (3), then Send invites. Each one appears as a row (1) with an Invited pill until they accept, and the × (2) removes them again.
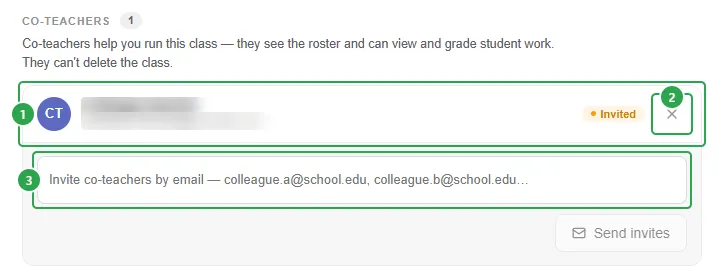
A co-teacher can do nearly everything you can: they see the roster and can view and grade student work. What they cannot do is delete the class.
Where to go next
Section titled “Where to go next”- Joining a class: the code, the link and the PIN from the student’s side.
- Create an assignment: publishing work to the class you have just filled.
- Reviewing & grading: following what the class does next.
- Assignments: how assignments and classes fit together.
- Google Classroom and School administration: the two rosters Mindomo can import from.